Sanitation guidelines for management of pests and diseases of greenhouse vegetables
Learn steps to take and why sanitation is an important cultural strategy for reducing the impact of pests and diseases on greenhouse vegetable crops.
Introduction
Sanitation is an important cultural strategy for reducing the impact of pests and diseases on greenhouse vegetable crops. Generally, sanitation involves the removal of both infested materials and potential sources of infestation, followed by disinfection of surfaces.
Various levels of sanitation should be implemented within the greenhouse. During crop production, basic sanitation takes place to suppress development of pests and diseases. However, at the end of each year, before re-planting of the spring crops, a major sanitation exercise occurs. This entails not only removing all plant material but also subsequently cleaning and disinfecting the greenhouse structure and equipment used within it. This process minimizes carryover of pests and disease sources to the new crop, thereby facilitating a clean start for the new crops. The benefits of a clean start include:
- more effective pest and disease suppression
- management of pesticide resistance development
- improved biological control programs
- a more vigorous, productive crop
For maximum impact, sanitation measures should be practised at all stages of production, beginning with propagation all the way to the end of the crop.
Measures during early crop establishment
Use clean planting material
As much as possible, purchase seed that has been treated to exclude disease organisms. Seeds can harbour several pathogens, such as those causing bacterial and viral diseases. Keep seedlings clean by never placing them directly on dirty floors (Figure 1). This can damage roots and infect them with soil-borne diseases such as Pythium and Fusarium root rot. It is imperative to examine all transplants from the plant propagator so that diseased or pest-infested plants can be discarded or treated immediately (Figure 2).
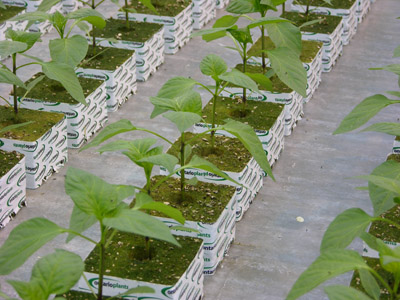
Figure 1. Pepper transplants on clean floor in propagation house.
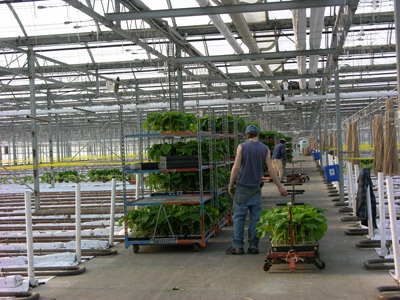
Figure 2. Transplants about to be planted in production house.
Monitor seedlings & transplants
Monitor seedlings and transplants at least once a week for early signs of pest damage or disease symptoms. Use yellow sticky cards (Figure 3) for early detection of arthropod pests such as whiteflies, fungus gnats, thrips and aphids. Place traps along walkways and close to doorways and air intakes, since that is where the pests are likely to enter the greenhouse. Inspect the traps at least weekly.
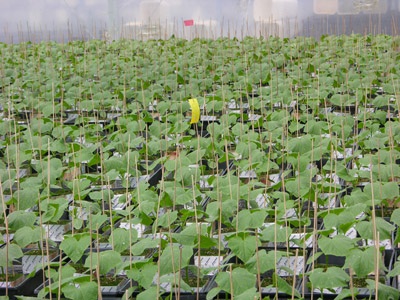
Figure 3. Yellow sticky card used for monitoring of pests in cucumber seedlings.
Minimize transfer of pests & diseases
- To prevent the transfer of pests and diseases from the older crop to the younger seedlings, workers in propagation facilities should not also work in production houses. If this is unavoidable, then workers should always work first in the seedling house before moving to the production area.
- Ensure all workers and visitors entering the propagation area are correctly dressed. This means wearing:
- clean clothes
- new or disinfected lab coats (Figure 4) or coveralls
- shoe covers (Figure 5) or new or disinfected boots (Figure 6)
- gloves
- Install a footbath at the entrance to the seedling area to be used by all persons (Figure 7).
- Install a disinfection mat for all small vehicles (Figure 8).
- Keep the disinfectant in footbaths and disinfection mats fresh at all times.
Remove potential sources of pests & diseases
- Remove all weeds from inside and immediately outside the greenhouse. Weeds can be a significant source of insects and mites all year.
- Never place hanging baskets of ornamentals over vegetable seedlings and transplants, because these can be a source of pests and diseases. Water dripping from the overhead baskets may create conditions for disease infection.
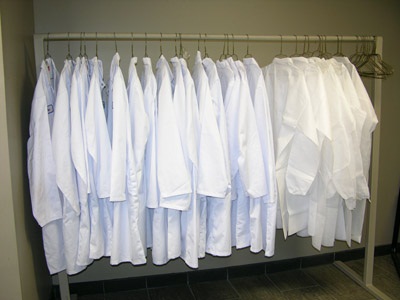
Figure 4. Rack of clean lab coats for visitors.
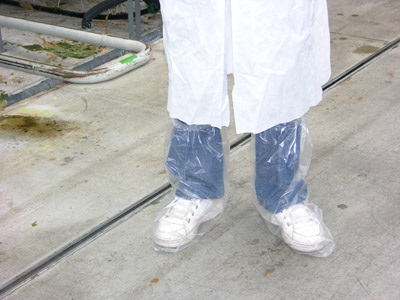
Figure 5. Visitor dressed in lab coat and plastic shoe covers.
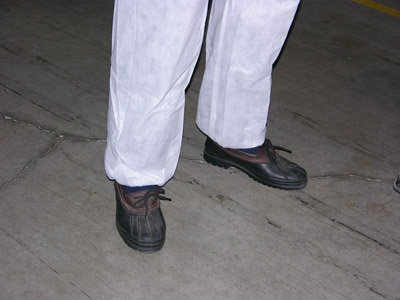
Figure 6. Visitor dressed in coveralls and disinfected boots.
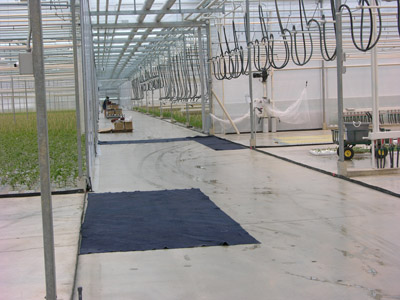
Figure 7. Footbath at edge of propagation area.
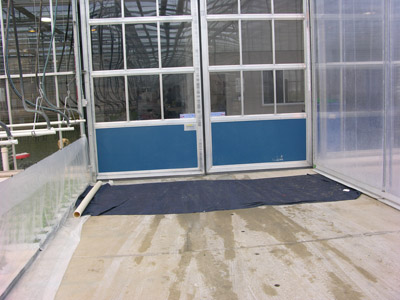
Figure 8. Disinfection mat for small vehicles at greenhouse entrance.
Measures during crop production
Monitor crops
For more efficient and effective management of pests and diseases, regularly monitor pests using sticky cards (Figures 9 and 10) and inspect the crop for early detection of pests and disease.
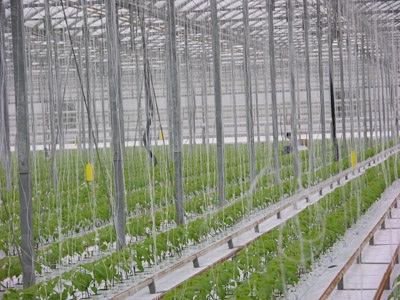
Figure 9. Yellow sticky cards used for monitoring young crop.
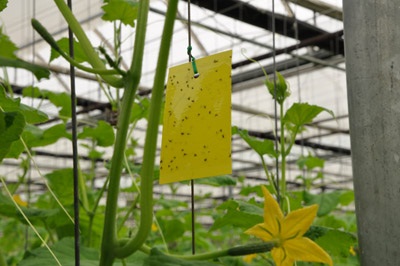
Figure 10. Yellow sticky card at top of canopy in older crop.
Minimize spread of infectious diseases (for example, bacterial canker, Tobacco mosaic virus, Pepino mosaic virus, etc.)
Infected plant material
- Block off and mark row(s) where infected plants are found.
- Before you enter the row, make sure you are wearing coveralls, boots and gloves. Take care not to touch any plants while walking along the row.
- Remove plants that show symptoms, taking care not to allow the infected plant to contact adjacent plants. Place infected plants in sturdy garbage bags.
- Additionally, remove 3-6 plants on either side of the plants exhibiting symptoms. Place them carefully in garbage bags.
- Walk out of the row, taking care not to touch other plants.
- Keep infected plants in garbage bags and ensure that they do not puncture the bags.
- Place these garbage bags in covered bins (Figure 11) until they are ready for proper disposal.
- Burn or deeply bury the infected material or take it immediately to the landfill site. Never dump infected plant material in the open field or leave it to be incorporated into the soil in fields.
- Ideally, replace growing media and string in the areas where infected plants were removed. Replace or disinfect drip stakes.
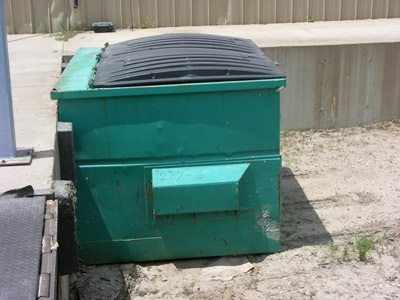
Figure 11. Covered bin for garbage bags containing discarded plant material.
Visitors
- To disinfect footwear, place a disinfection system for shoes at the main entrance and at every entrance into the operation (Figures 12 and 13).
- Strategically locate hand disinfection dispensers at all entrances (Figures 14 and 15).
- Require visitors to wear coveralls or clean lab coats (Figure 4), disposable boots or shoe covers, and gloves.
- Request that visitors remain on the walkways and do not enter the crop.
- When visitors leave, dispose of their boots and gloves into a bin specially provided for this purpose.
- Ensure that used coveralls are laundered after each use.
- When disease is detected in the crop, alert all visitors to its presence and its ease of transmission to avoid inadvertent spread of the disease.
- Prevent pets from wandering into the cropping area.
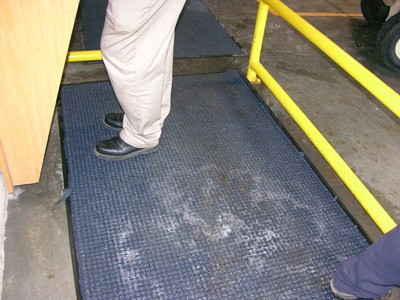
Figure 12. Footbath consisting of a pad moistened with disinfectant.
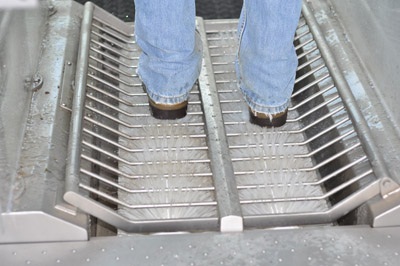
Figure 13. Automatic footbath consisting of mechanical brushes and sprayed disinfectant.
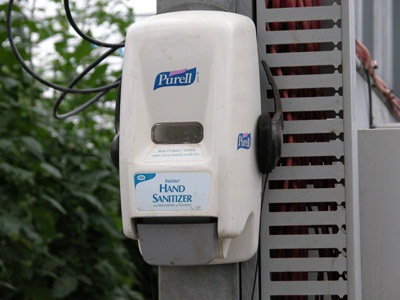
Figure 14. Disinfectant dispenser placed at the greenhouse entrance.
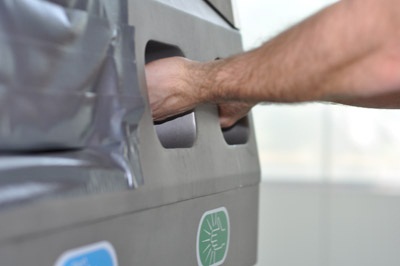
Figure 15. Mechanical disinfectant dispenser.
Workers & equipment
- To minimize transfer of disease between sections, assign workers, coveralls (Figure 16), tools, carts and other equipment to specific greenhouse sections.
- If the disease is not widespread, always work in infected areas at the end of the workday. Alternatively, shower and change entire work gear before entering uninfected areas.
- Dip tools and gloved hands in an approved disinfectant between plants or at least between rows.
- If knives or clippers are used, disinfect them between plants and use a different knife for each row.
- After leaving each greenhouse, properly discard disposable gloves and boots, leave shoes/boots for disinfecting and leave coveralls for laundering and disinfecting.
- Teach all workers how to identify disease symptoms.
- Discourage workers from bringing vegetables from other sources onto the premises to avoid inadvertent handling or careless disposal of diseased produce.
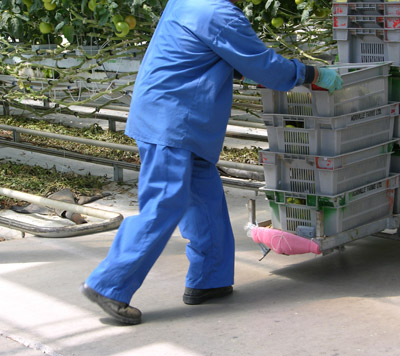
Figure 16. Worker in regularly laundered uniform.
Crates, carts & packing
- Install disinfection mats at entrances to disinfect the wheels of carts and forklifts.
- Do not move carts and crates from infected areas to non-infected areas.
- Power wash, clean and disinfect all carts (Figure 17) and crates at the end of each day.
- Do not share carts, crates, boxes, etc. with other operations.
- Do not handle produce from external sources for re-packing at a production site.
- Dispose of all culls by burying them or taking them to the landfill immediately.
- Employees who work in the packing area should not work in production areas. Where this is unavoidable, workers should always disinfect their hands, wear gloves, put on clean coveralls and disinfect their shoes before moving to the production area.
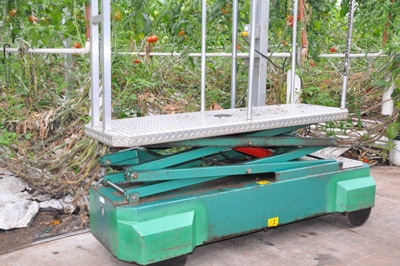
Figure 17. Workers' cart kept clean by washing and disinfecting at end of each day.
Cultural practices
- To reduce the incidence and spread of diseases within the greenhouse, promptly remove all plant debris from walkways (Figure 18) and drains.
- Dispose of all plant debris properly by either burying it or taking it to the landfill.
- Disinfect irrigation water and re-circulated water.
- Do not leave trash piles in or near the greenhouse. Infected plant material can be blown back into the greenhouse or could be carried in on feet and tires.
- Never have other crops (for example, ornamentals, grape vines, fig trees) in the greenhouse. These can serve as alternative hosts for pests and sources of diseases.
- Maintain good drainage to eliminate puddles and wet surfaces, which provide ideal breeding sites for pests such as fungus gnats and shoreflies.
- Properly grade the greenhouse floor to eliminate stagnant surface water.
- Maintain a strip of mowed lawn around the greenhouse that is at least 10 m wide (Figure 19). Alternatively, create a 10-metre plant-free strip around the greenhouse (for example, asphalt or nursery weed barrier with gravel on top). If herbicides are used outside, beware of drift near ventilators and intake fans. Bedding plants and home vegetable gardens are excellent habitats for insect and mite pests, so make sure they are not close enough to the greenhouse to serve as a potential source of infestation.
- Where feasible, consider installing insect screens to exclude pests. Screening is an effective and simple method of excluding larger pests such as moths, beetles, bees and bugs from the greenhouse (See OMAFRA Factsheet, Screening of greenhouses for insect exclusion).
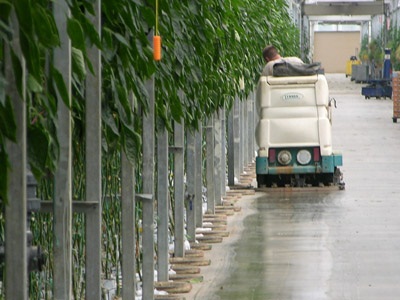
Figure 18. Walkway being mechanically cleaned.
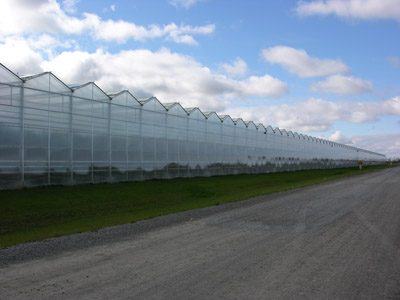
Figure 19. Wide strip of lawn around greenhouse to suppress growth of weeds.
Year-end cleanup
Avoid overlap of crops
To minimize carryover of pests and diseases, it is best to have a crop-free period. This means not having any overlap between the new crop and the old one on a single operation. Overlapping occurs when a fall crop is interplanted with transplants for the spring crop or when spring transplants are planted while an old crop is still standing in another part of the same operation. Avoiding overlap is particularly important for breaking the cycle of persistent disease organisms and pests that disrupt a biological control program in the new crop.
Treat crops before removal
To reduce carryover of arthropod pests, crops may be treated before removal and shortly after the last harvest. This timing minimizes the opportunity for them to disperse and hide in the ground under plastic sheeting or in the cracks and crevices in the greenhouse structure. It also prevents the pests from moving outdoors to overwinter in weeds or entering neighbouring greenhouses. During treatment, maintain warm temperatures (25-30°C) to keep the pests active and therefore more susceptible to pesticides. These treatments may be chemical or non-chemical, as described below.
Chemical treatment
Applying effective pesticides before and after crop removal usually reduces most of the insect and mite pest populations. As with the use of any pesticide, follow proper procedures for application and adequately ventilate the greenhouse before re-entering.
Non-chemical treatment
Maintain ambient temperatures of about 40°C and a relative humidity of less than 50% for a minimum of 3-4 days to effectively reduce populations of insect and mite pests. This treatment may be repeated after removing the crop. Such an approach is best done during the summer months when warm outdoor temperatures make it easier to increase greenhouse temperatures.
Crop disposal
After treatment and removal of the crop, use yellow sticky cards located close to ground level to monitor for any remaining flying pests, such as thrips, whiteflies and aphids. Check these cards often. If any pests are detected, take further remedial action.
Disposal of crop residues
To minimize the survival and dispersal of pests and diseased tissue, remove and properly dispose of residual crop debris immediately (Figure 20). Surface disking plant residues into the soil in adjacent fields is not sufficient. For instance, bacteria that cause bacterial canker can survive for at least 24 months if residues are laying on the surface. However, if the same debris is deeply buried into the soil, survival is reduced to about 7 months. If you cannot remove debris from the site or bury it immediately, place it in covered bins and dispose of it at the landfill site.
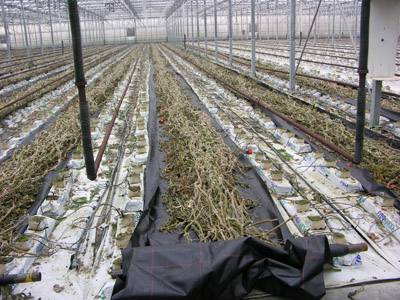
Figure 20. Residue of old crop to be removed.
Properly clean and disinfect
Before disinfection, clean and wash the greenhouse structure and all associated equipment, such as drip stakes, tools, crates, irrigation equipment and vehicles. Debris or organic matter remaining on surfaces can react with the disinfectant and neutralize its active ingredient.
Textured surfaces (for example, cement and wood) may hold organic matter and fungal/bacterial spores that can cause disease in greenhouse plants. Scrub or clean these areas with a detergent or commercial-grade cleaner and a power washer. Note that many disease-causing organisms get lodged on horizontal surfaces, such as on rafters, window ledges and the tops of overhead piping.
For best results, mix disinfectants in warm water (approximately 20°C) and apply the solution to dry surfaces during the evening in a warm greenhouse. Generally, contact time between the disinfectant and a surface should be a minimum of 15-30 min for optimum results. In general, lower temperatures require longer contact times, whereas higher temperatures increase the efficiency of disinfectants.
Structure
- Remove all crop debris, strings, etc. from the greenhouse.
- Bag and dispose of plants with infectious diseases immediately. Leaky bags may allow the disease to escape and carry over to the new crop.
- Deeply bury the infected material, or have a disposal company take away the material. Never dump infected plant material in an open field, where it can be spread by wind.
- Power wash the entire structure (Figure 21) with or without a detergent (detergents help remove greasy films and detach debris from surfaces). Pay particular attention to the overhead piping.
- Avoid splashing dirt onto the structure.
- Work from the back to the front of the greenhouse.
- Disinfect the structure by wetting dry surfaces with a broad-spectrum disinfectant.
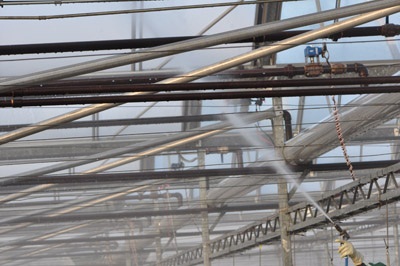
Figure 21. Greenhouse structure being washed after removal of old crop.
Irrigation system
- Drip lines can either be replaced or cleaned and disinfected.
- To clean the lines, check the manufacturer's recommendations to determine the pH tolerance of drippers before filling the irrigation system with acid (pH 1.5-2.0). Leave for 24 hr to remove precipitate. Rinse with clean water afterwards. Flush the lines and tanks with a disinfectant several times over a 24-hr period and rinse afterwards with fresh water.
- Drip stakes (Figure 22) can either be replaced or disinfected by soaking them in a disinfectant. Rinse them with water afterwards. Spraying the disinfectant onto the drip stakes is not sufficient.
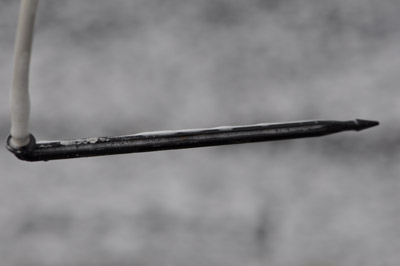
Figure 22. Wet drip stake during washing and disinfection process.
Tools and equipment
- Power wash and disinfect all tools and equipment (Figures 23 and 24) used in the greenhouse, including forklifts and tractors.
- Prevent dirt from contaminating roots of seedlings or irrigation water. Dirt is a source of countless pathogens, including Pythium, Fusarium, Corky root rot and Clavibacter michiganensis (organism that causes bacterial canker).
- Use footbaths to disinfect footwear.
- Use wide mats soaked with disinfectant to clean the wheels of tractors and other small vehicles used in the operation.
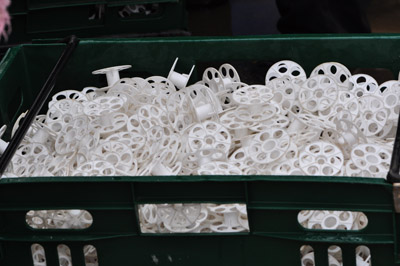
Figure 23. Washed and disinfected rollers ready for loading string for the new crop.
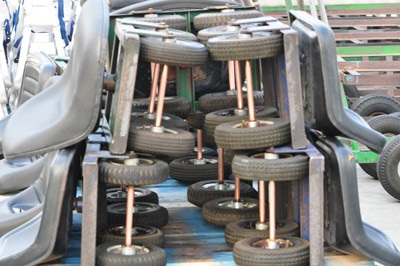
Figure 24. Greenhouse equipment that has been washed, disinfected and packed.
Growth media disinfection
New growing media should be used for every crop. However, if the media is to be re-used, then it should be disinfected. Sterilizing growth media will reduce pest carryover, particularly of spider mite and thrips. Between August and September, diapausing mites move downwards from the crop and can hide in rockwool slabs, under the ground-sheet plastics, in crop debris, etc., where they are sheltered until favourable conditions resume. Thrips pupate on the ground and can survive in similar refuges. Older growing media often harbour many disease pathogens that attack the roots. Growth media may be disinfected using steam or fumigation.
Soil steaming
To efficiently steam growing media such as soil or any mix of organic components, the media should have a good tilth and be neither too wet nor too dry. Use a soil thermometer to ensure that the media is heated to over 80°C for 30 min. If this temperature or time is exceeded, problems of waterlogging, high salts and ammonia burn may be encountered.
Rockwool steaming
The time required for steaming depends on the wetness of the rockwool and temperature used. Steaming at 90°C for 30 min should be adequate. Generally, the wetter it is, the longer the steaming period. For this reason, the substrate should be as dry as possible before steaming. Rockwool that is stacked on pallets and not wrapped in polyethylene bags can be steam-sterilized in 2 hr. Rockwool wrapped in polyethylene requires 5 hr of steaming. Do not stack the rockwool higher than 1.5 m (5 ft.). To stabilize the stacked slabs, place each row at right angles to the row beneath. In addition, leave a 2.5 cm (1 in.) space between individual slabs to allow for better steam penetration.
Cultural practices
Remove all weeds in and around the greenhouse, clearing as large a perimeter as possible. Weeds not only harbour insect and mite pests, they are also a good source of many viruses and other diseases.
Once the greenhouse structure is clean (Figure 25), biosecurity/sanitation practices should be maintained. Use disinfection mats and footbaths at all entrances to ensure that all shoes, vehicle wheels, etc. are clean and disinfected before entering boiler rooms and the greenhouse area. Have coveralls and hand sanitizers available for all visitors. As far as possible, restrict activities of visitors to the main walkways to minimize contact with the crop.
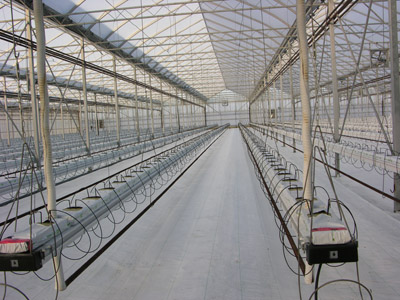
Figure 25. A clean greenhouse ready for planting of new crop.