Burial of on-farm deadstock
Learn about the requirements for on-farm burial of deadstock according to the Nutrient Management Act, 2002. This is technical information for Ontario livestock and poultry producers.
ISSN 1198-712X, Published October 2023
Introduction
This fact sheet describes some of the requirements for on-farm burial of deadstock as specified in O. Reg. 106/09 under the Nutrient Management Act, 2002 (NMA). The fact sheet does not cover all burial requirements contained in the regulation nor deadstock burial under emergency situations such as after a fire or other catastrophe. For this information, refer to the regulation.
How and why burial works
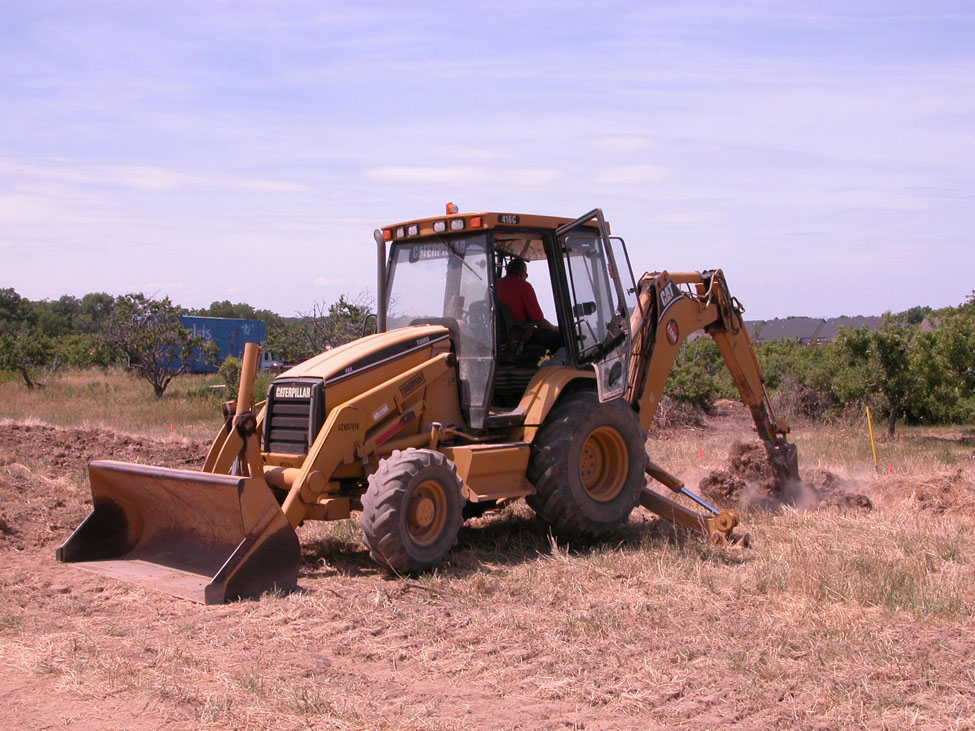
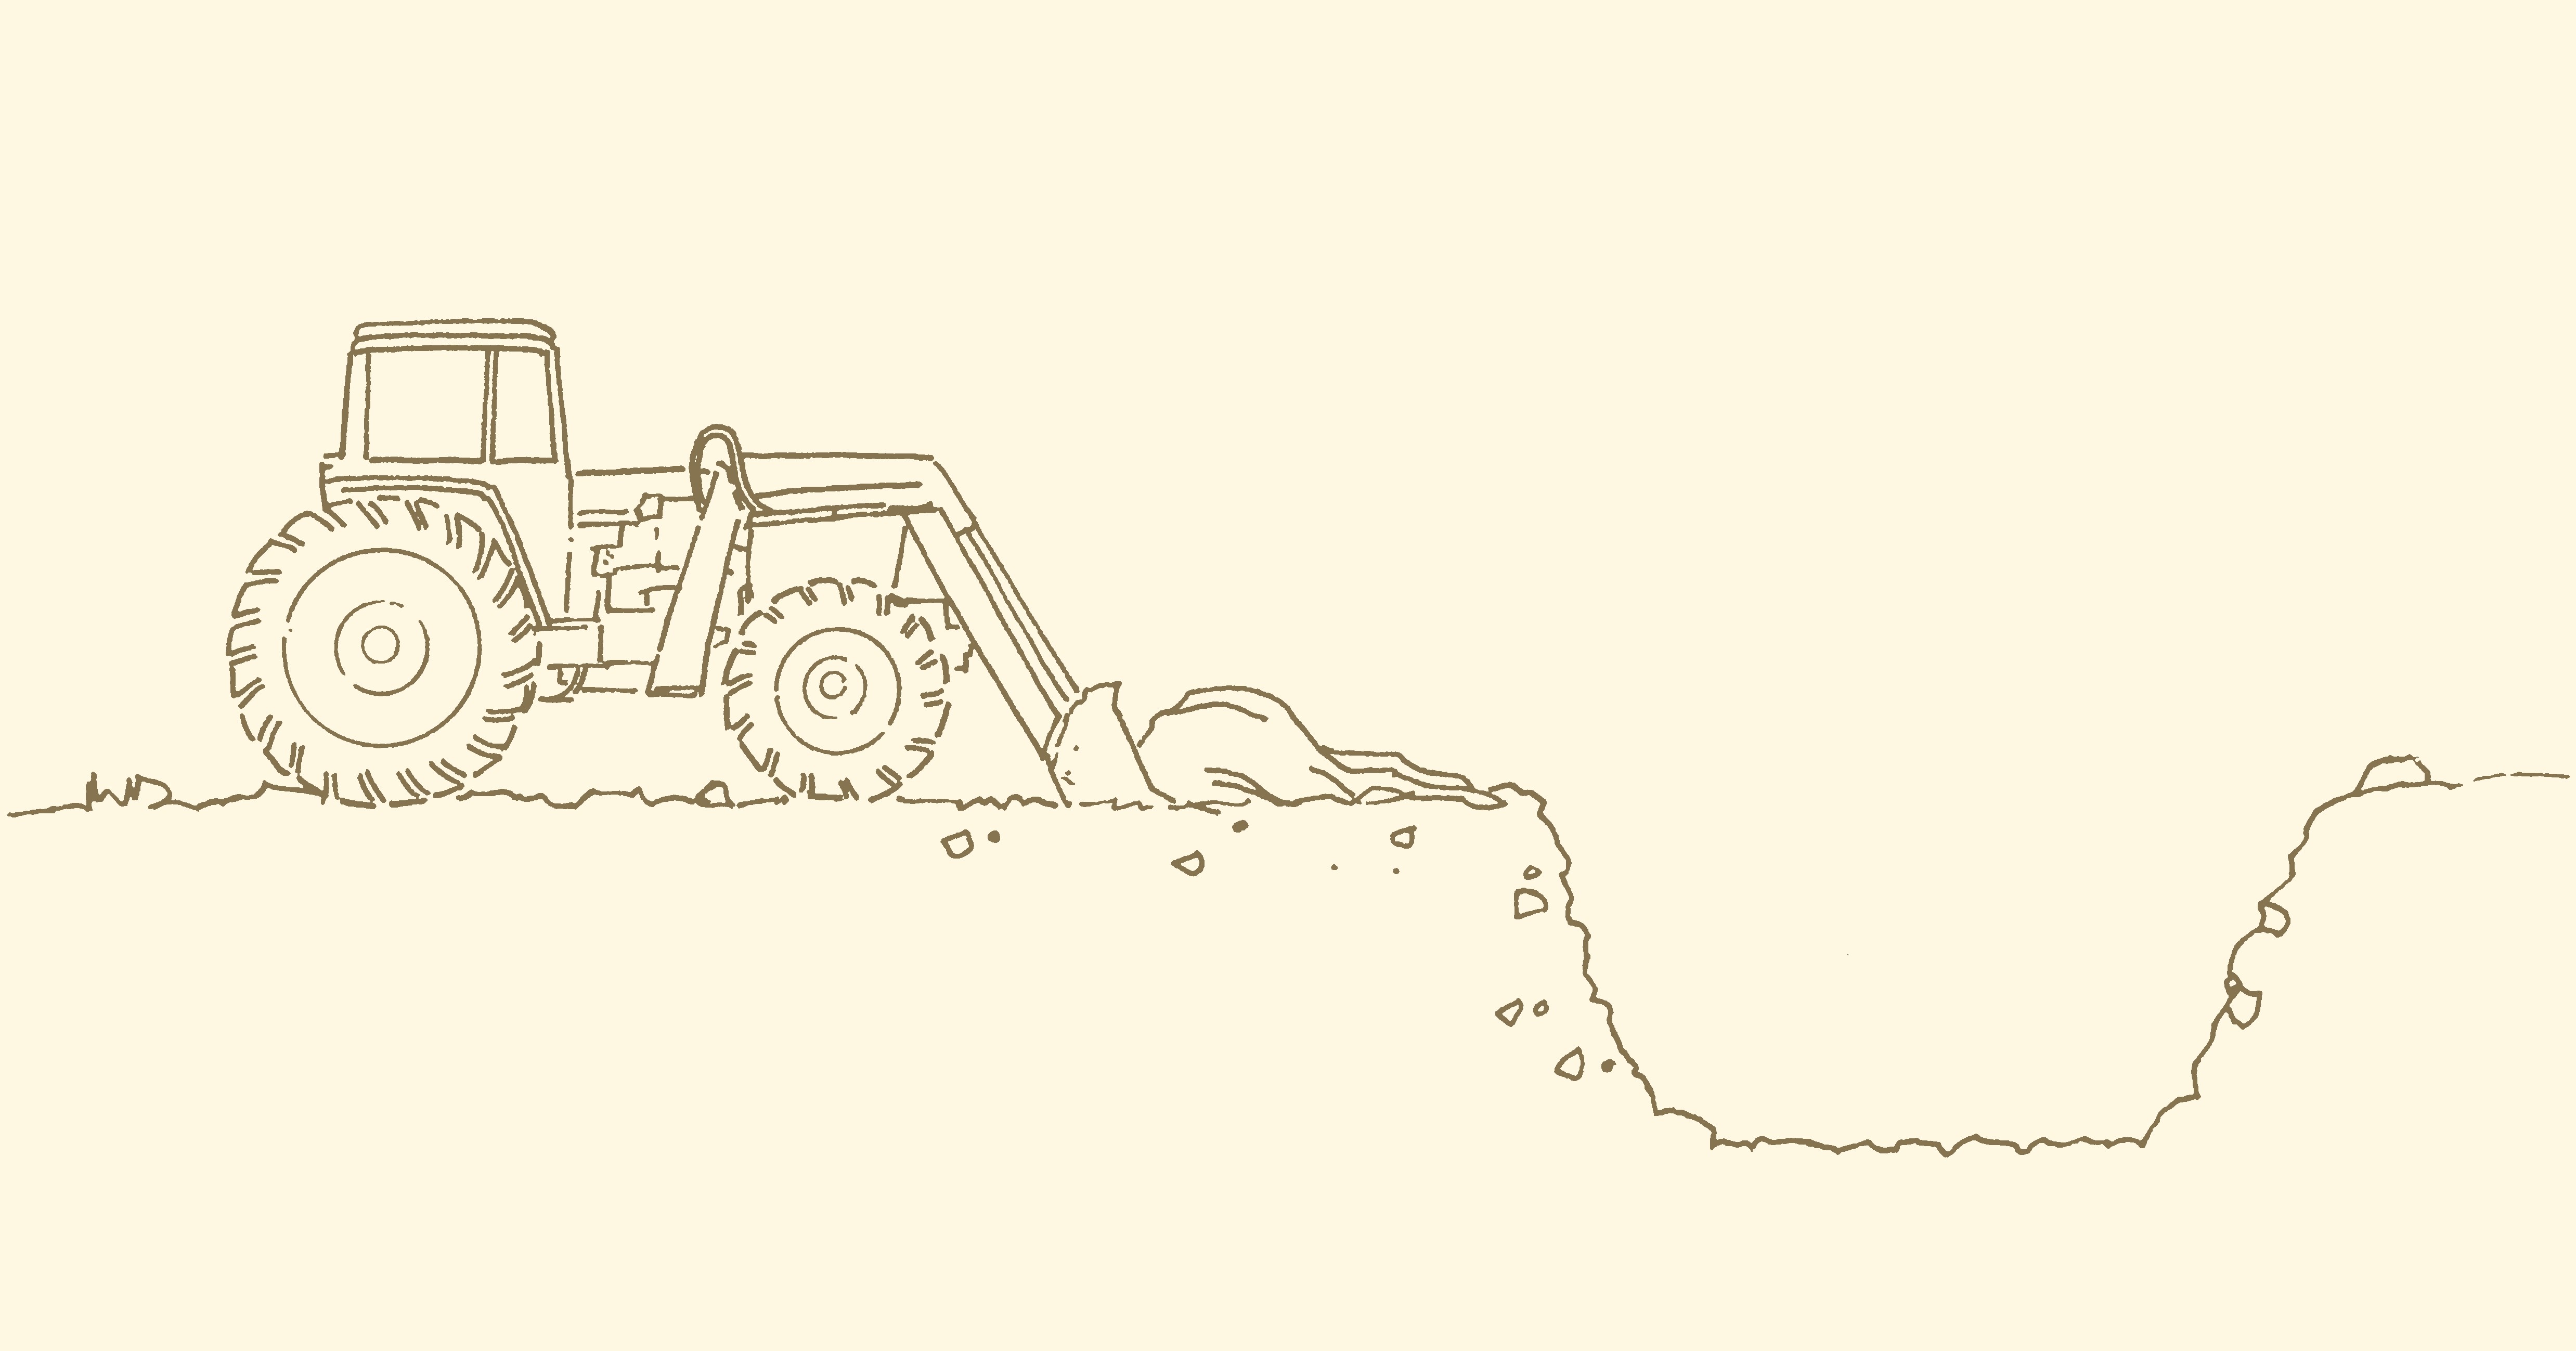
For generations, farmers have buried deadstock by digging a pit or trench, placing carcasses in it and covering them with excavated soil material (Figure 1). Burying deadstock must be done properly to:
- prevent a nuisance to neighbours
- protect against digging by scavengers
- maintain biosecurity for adjacent livestock operations
- protect local ground and surface water
Decomposition of buried deadstock is like a slow, composting process. Composting deadstock works best if they are mixed well with a good carbon substrate, such as sawdust, under favourable moist, warm, aerobic conditions. Similarly, burying deadstock works best if they are:
- mixed with soil, or have as much soil to deadstock contact as possible
- buried in well-drained, warm soils, with more aerobic (oxygenated) conditions
Under favourable conditions, decomposition can occur in a few months, especially in the biologically active upper layers of the soil. However, under poorer conditions, decomposition can take years, especially if deadstock are packed together in wet soil, and buried deep, where soil temperatures are cool.
Advantages of burial
- simple, requiring little training
- uses readily available equipment
- relatively inexpensive
- suitable to many locations
- biosecure, since deadstock remain on the farm
The regulation permits farmers to keep deadstock in cold storage for up to 14 days following death, or in frozen storage for up to 240 days. Freezers can work well in conjunction with burial for smaller deadstock, since a freezer can be filled over time, then emptied in a burial pit when digging conditions are suitable. Because freezers have fixed volumes, it is easy to match their frozen contents to a predetermined burial pit size.
Selecting the right sites for burial
Locating the burial site in the right place is critical for good carcass decomposition and protection of the environment. Generally, soil materials ranging from sandy loams to clays that are well-drained to imperfectly drained are suitable for burial. However, the regulation does not permit burial of deadstock in soils where there is a higher risk of polluting groundwater. These soils include:
- organic soils (more commonly known as peat, muck, bog or fen soil)
- soils considered hydrologic soil group AA, which have a combination of rapid infiltration rates (such as gravel) as well as a depth to the uppermost identified bedrock layer of less than 0.9 m. These conditions are not common in Ontario.
The regulation does not permit the burial of deadstock in areas subject to flooding once or more every 100 years. To find out if you are in such an area, contact your local conservation authority or municipality.
The regulation requires the lowest point of a burial pit to be at least 0.9 m (3 ft) above the top of the uppermost identified bedrock layer or aquifer. Table 1 shows several setbacks for burial pits. For more specific information, refer to the regulation itself.
| Feature | Setback |
|---|---|
| Highway | 30 m |
| Lot line of land on which burial pit is located | 15 m |
| Flow path to top of bank of the nearest surface water or tile inlet | 100 m |
| Field drainage tile | 6 m |
| Lot line of land that has an industrial or parkland use | 100 m |
| Lot line of land in a residential area, and from land that has a commercial, community or institutional use | 200 m |
| Municipal well | 250 m |
| Drilled well with depth at least 15 m and watertight casing to depth at least 6 m | 50 m |
| Any other well (such as a gas well) | 100 m |
| Livestock housing facility, outdoor confinement area, and residential structure (neighbour’s house) located on land not part of the land on which the burial pit is located | 100 m |
| Another burial pit on the same parcel of land, if it is open, still in use and not closed, or has been closed for less than 10 years | 60 m |
| Areas subject to flooding once or more every 100 years | Not allowed |
| Organic soil, or soil that is hydrologic soil group AA | Not allowed |
Digging safely
The regulation specifies a maximum of 2,500 kg total deadstock per burial pit, so the weight of each dead animal determines the number of deadstock per pit (Table 2).
Due to the 2,500 kg/pit limitation, very large or deep pits are not necessary; generally, digging deeper than about 1.2 m (4 ft) makes little sense. Limiting the depth of burial pits to 1.2 m places deadstock in the biologically active part of the soil, protects groundwater and avoids the dangers of deep trenches.
| Average weight per deadstock (kg) | Number to fill a burial pit |
|---|---|
| 2.5 kg (small deadstock: poultry, mink) | 1,000 |
| 50 kg (mid-size: sheep, veal, goats, swine) | 50 |
| 500 kg (large: cattle, horses) | 5 |
Maximum allowable total: 2,500 kg
The Infrastructure Health and Safety Association (IHSA) defines trenches (pits) as excavations where the depth exceeds the width of the pit. The IHSA cautions anyone digging trenches to be aware of factors such as soil type, moisture content, weather or excessive weight that might cause cave-ins, such as heavy equipment beside a trench.
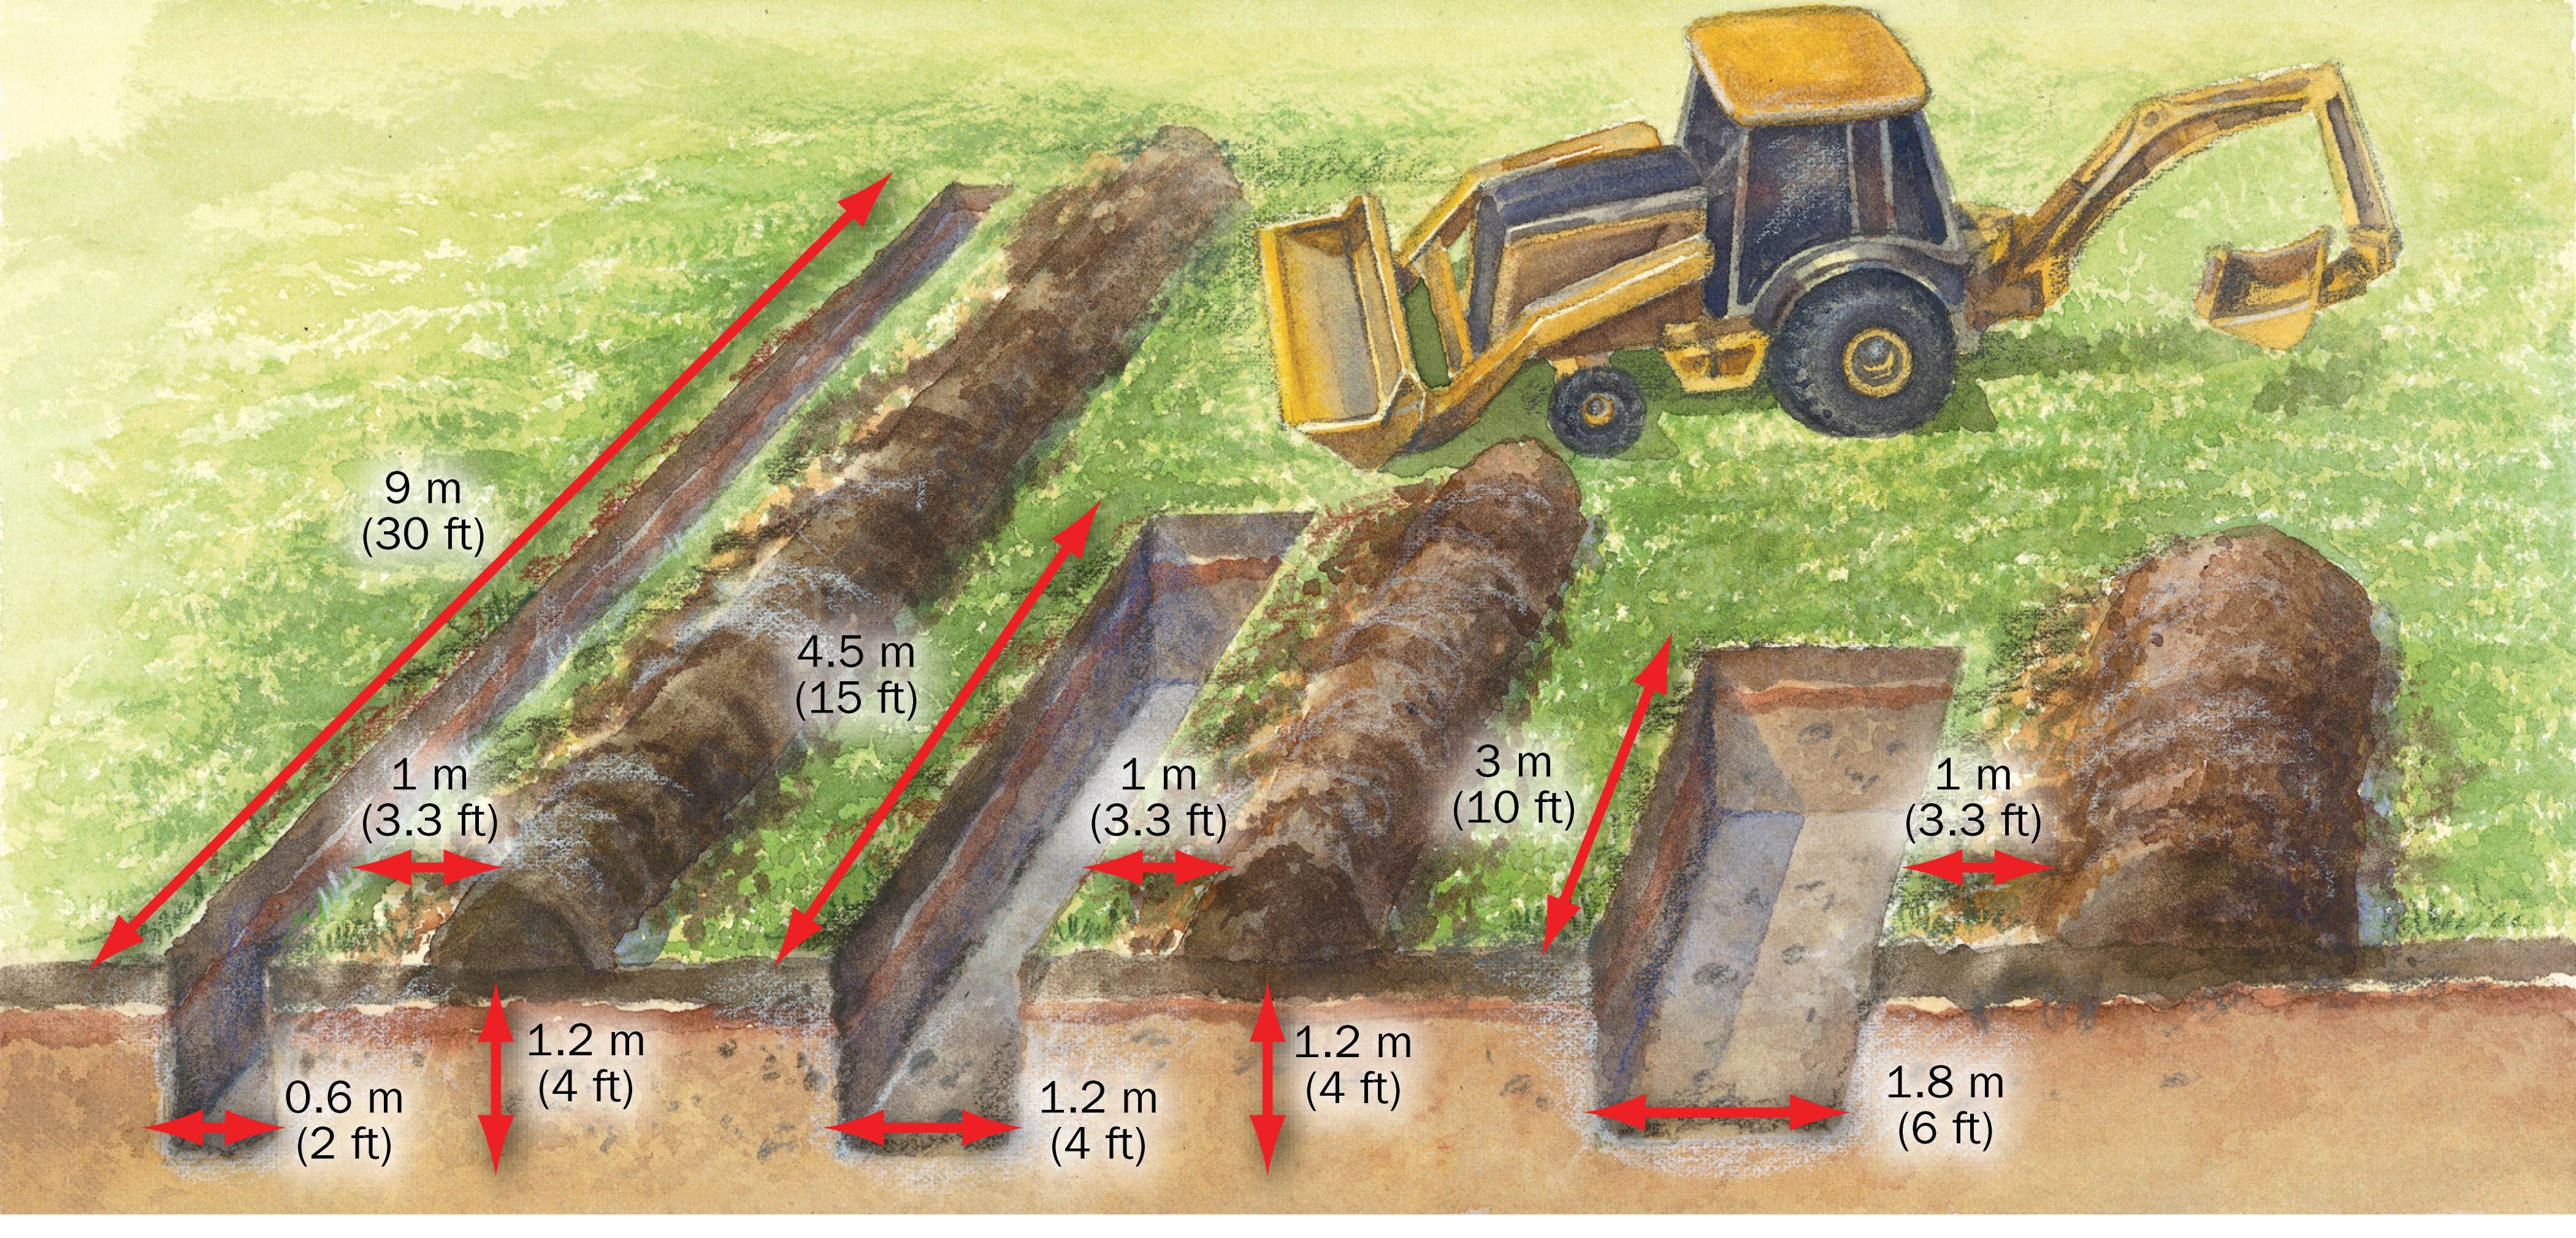
Never climb into any pit deeper than 1.2 m (4 ft) unless it is properly sloped, shored or protected by a trench box. This is impractical for burying deadstock. Figure 2 shows different pits 1.2 m (4 ft) deep that will hold about 2,500 kg of deadstock. Bury smaller deadstock in narrow pits, to maximize soil-to -carcass contact, and larger deadstock in wider pits, to accommodate their awkward body dimensions. Closing these pits would require a minimum of 0.6 m (2 ft) of soil, to form a mound higher than the level of the ground at the perimeters of the pit.
Accessible description of Figure 2
Type of pits
There are 3 types of pits (Table 3):
- single-use
- multiple-use
- auger pits
| Type | Suitability |
|---|---|
| Single-use pit | Death of one or more animals at the same time due to sickness, heat stress, or for deadstock stored over time so burial is done all at once (such as a freezer full of dead chicken broilers). Single-use pits are usually open only a few hours. |
| Multiple-use pit | Operations with daily to weekly deadstock (weaner pigs, poultry). Since all deadstock placed must be covered at all times with 0.6 m (2 ft) of soil, dig these pits oversized, since soil is being constantly added as deadstock are placed, which takes a lot of room. Flag pits as open or fence them off. Frozen soil may make covering a pit difficult in winter. |
| Auger pit | Smaller deadstock on smaller farms with a few periodic death losses. |
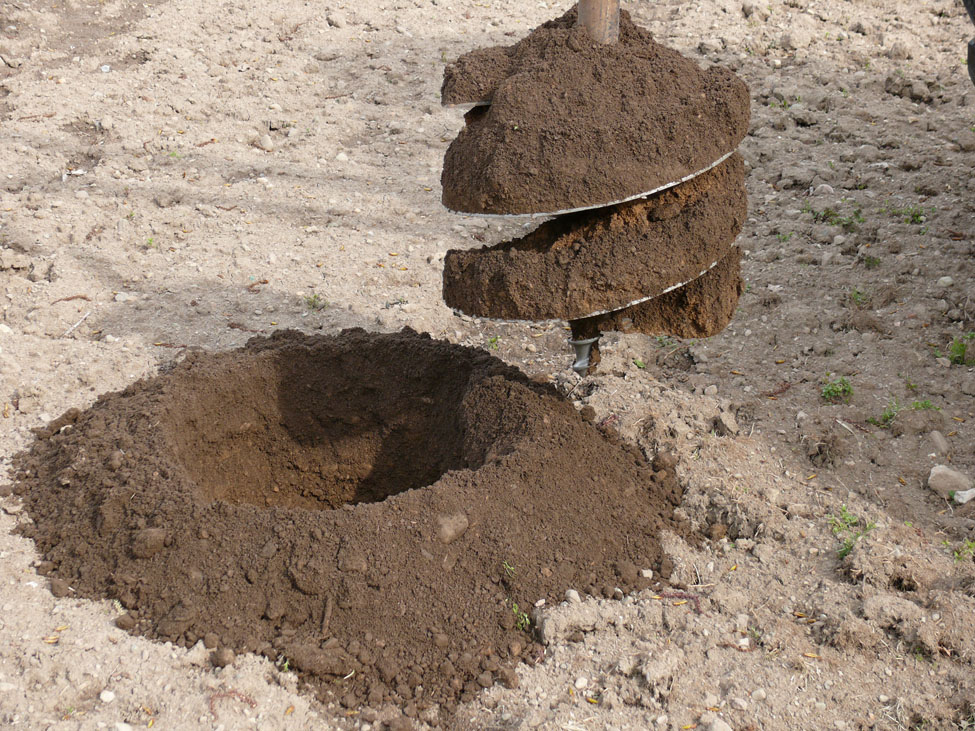
Augers over 0.6 m (24 in.) in diameter and augers that dig more than 1.2 m (48 in.) deep are costly and require a lot of tractor power. Auger pits will only hold a few smaller deadstock.
The type of soil determines the strength and stability of pit walls. This is especially important for pits that will remain open for up to 120 days. Suitable soils that will allow pit walls to be stable for an extended period include:
- type 1 soils: compacted loamy and clayey soils, dense loamy glacial tills
- type 2 soils: well-structured loam, clay loam, clay
Unsuitable soils that might have unstable pit walls over an extended period include:
- type 3 soils: sand, granular materials, and silty or wet clays
- type 4 soils: silty clays with high moisture content
Once a pit is dug, its sides are exposed to drying. The longer the exposure, the greater the risk of a cave-in. Rain, melting snow, thawing earth and surface water all produce changes in soil conditions that can severely affect pit stability. Heavy equipment beside a pit can affect its stability, so stay as far away as possible. Place the soil excavated from the pit at least 1 m (3.3 ft) from the edge of the excavation.
The regulation specifies a burial pit must be immediately closed when 120 days have elapsed since the day the pit was first opened, or when 2,500 kg of deadstock have been buried in the pit, whichever comes first.
Sizing the pit
Deadstock have odd shapes, making them difficult to bury, especially if they have begun to bloat or rigor. The effective burial bulk density (EBBD) of deadstock is the weight of a deadstock carcass at death, divided by the effective volume it takes up in a burial pit.
EBBD = weight of deadstock carcass at death ÷ effective volume it takes up in burial pit
The effective volume is difficult to establish, because different animals have different profiles and awkward shapes when buried, and there are unavoidable air pockets. The EBBD of deadstock is estimated in the broad range of 175–1,000 kg/m3 (10.9–62.4 lb/ft3), but for planning, use 400 kg/m3 (25 lb/ft3). When soil is placed on deadstock, it fills some air pockets, and as deadstock decomposes, soil settles into body cavities.
Use Table 4 as a guide for burial pit dimensions dug by backhoe. Modify dimensions as necessary based on the shape of your deadstock. It is better to over-dig than under-dig. Once deadstock are in the pit, do not move them again. Because deadstock must be covered with at least 0.6 m (2 ft) of soil, multiple-use pits may have to be longer than shown in Table 4.
The dimensions in Table 4 are based on:
- EBBD: 400 kg/m3 (25 lb/ft3)
- 2,500 kg ÷ 400 kg/m3 = 6.25 m3 (220 ft3)
- pits are 0.9–1.2 m (3–4 ft) deep
- pit widths are in multiples of 0.6 m (2 ft), a typical backhoe bucket width
- the top of deadstock is below original grade level
| Deadstock size and type | Pit dimension | Total weight to bury 250 kg |
Total weight to bury 1,000 kg |
Total weight to bury 2,500 kg |
|---|---|---|---|---|
| Small (poultry, mink) | width | 0.6 m | 0.6 m | 0.6 m |
| Small (poultry, mink) | depth | 0.9 m | 1.2 m | 1.2 m |
| Small (poultry, mink) | length | 1.2 m | 3.6 m | 9.0 m |
| Mid-size (sheep, veal, goats, swine) |
width | 1.2 m | 1.2 m | 1.2 m |
| Mid-size (sheep, veal, goats, swine) |
depth | 0.9 m | 1.2 m | 1.2 m |
| Mid-size (sheep, veal, goats, swine) |
length | 0.6 m | 1.8 m | 4.5 m |
| Large (cattle, horses) |
width | N/A | 1.8 m | 1.8 m |
| Large (cattle, horses) |
depth | N/A | 1.2 m | 1.2 m |
| Large (cattle, horses) |
length | N/A | 1.2 m | 3.0 m |
Example: 40 dead feeder lambs weighing a total of 1,000 kg require a burial pit at least 1.2 m wide × 1.2 m deep × 1.8 m long (4ft × 4 ft × 6 ft)
Formula for calculating length of pit in metres:
L÷ = Total kg of carcasses ÷ EBBD (kg/m3) ÷ width of pit (m) ÷ depth of pit (m)
Use Table 5 as a guide for tractor auger burial pit dimensions, knowing the total weight of deadstock to bury and the type of animal. Modify dimensions as necessary, based on the shape of your deadstock. Unless an auger pit has a large diameter and is augered deep, it will not hold many deadstock, but it may be an option for some operators.
| Deadstock size and Type | Depth, diameter | Deadstock weight 50 kg |
Deadstock weight 200 kg |
|---|---|---|---|
| Small (poultry, mink) |
depth | 1.8 m | 1.8 m |
| Small (poultry, mink) |
diameter | 0.3 m | 0.6 m |
| Mid-size (sheep, veal, goats, swine) |
depth | 0.9 m | 1.2 m |
| Mid-size (sheep, veal, goats, swine) |
diameter | 0.45 m | 0.75 m |
Example: 8 dead feeder lambs weighing 200 kg in total require an auger burial pit at least 1.2 m deep × 0.75 m diameter (4 ft × 2.5 ft).
Digging near field drainage tiles
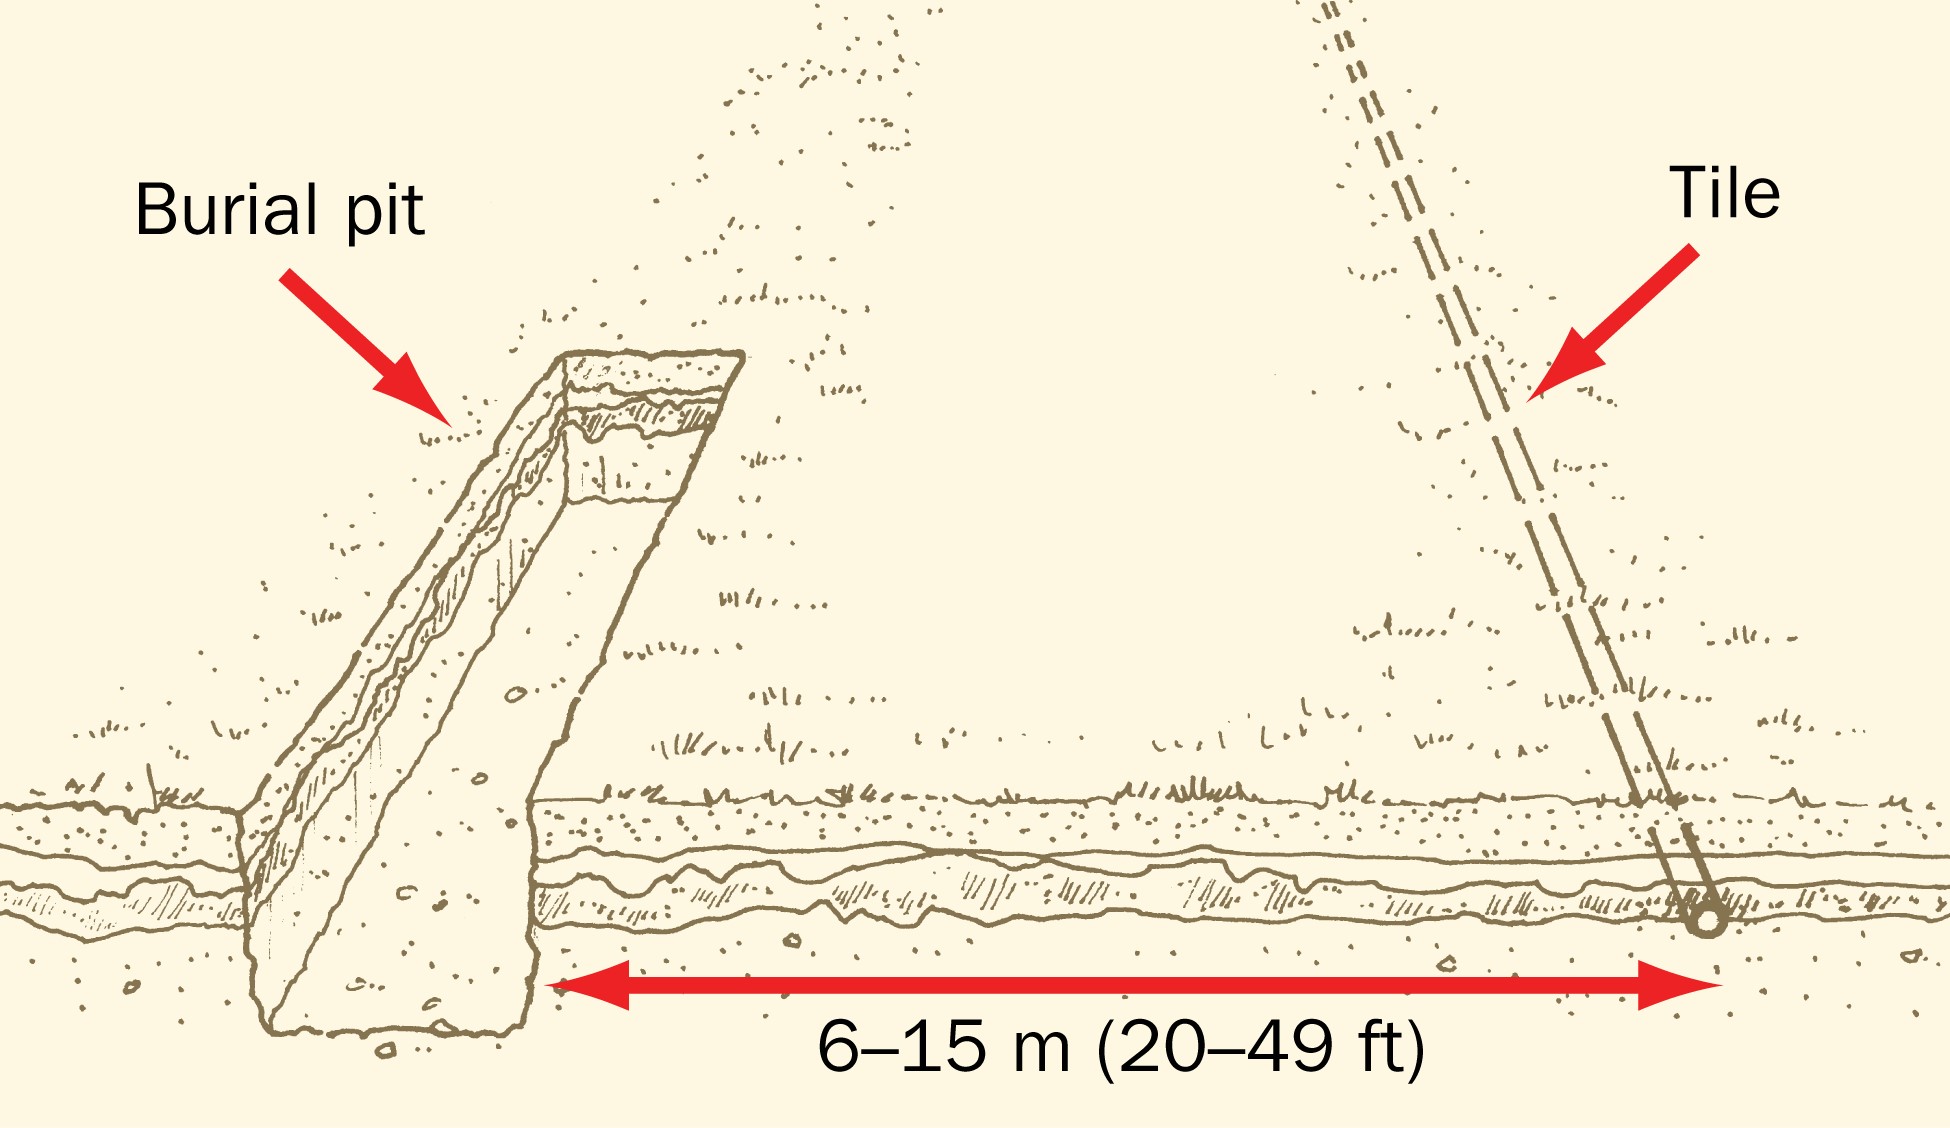
Field drainage tiles are prevalent on Ontario farms. To prevent leachate reaching them, avoid burying deadstock near tiles. The regulation specifies that every part of a burial pit must be at least 6 m (20 ft) from a field drainage tile (Figure 4). Further, if any part of the burial pit is less than 15 m (49 ft) from a field drainage tile, deadstock must be placed so that the highest point of the uppermost deadstock is lower than the lowest point of the nearest field drainage tile. This way, any leachate from the burial pit would be below the level of the tile and would not be able to reach it.
Accessible description of Figure 4
Placing deadstock in burial pits
Within about 48 hours of death, some carcasses begin to bloat due to retained gases; lancing (puncturing or venting) carcasses larger than 100 kg is sometimes necessary. Use a bale spear to cut a deep stab wound posterior to the ribs to vent the thoracic and abdominal cavities. Lance deadstock just before placing it in the pit. Noxious gases and bodily juices are likely to escape.
Plan carefully how to place carcasses in the pit. Do not drop them in from a tractor front-end loader bucket unless your front wheels are well back from the pit. Push large, heavy carcasses, such as cows, into the pit from the side. Always stay as far away as possible from the pit with the tractor (Figure 5).
Adding lime on top of carcasses is not recommended. In the past, lime was added to discourage scavengers, prevent odours and slow decomposition. Correctly buried deadstock will not attract scavengers or produce odours.
Covering deadstock with soil
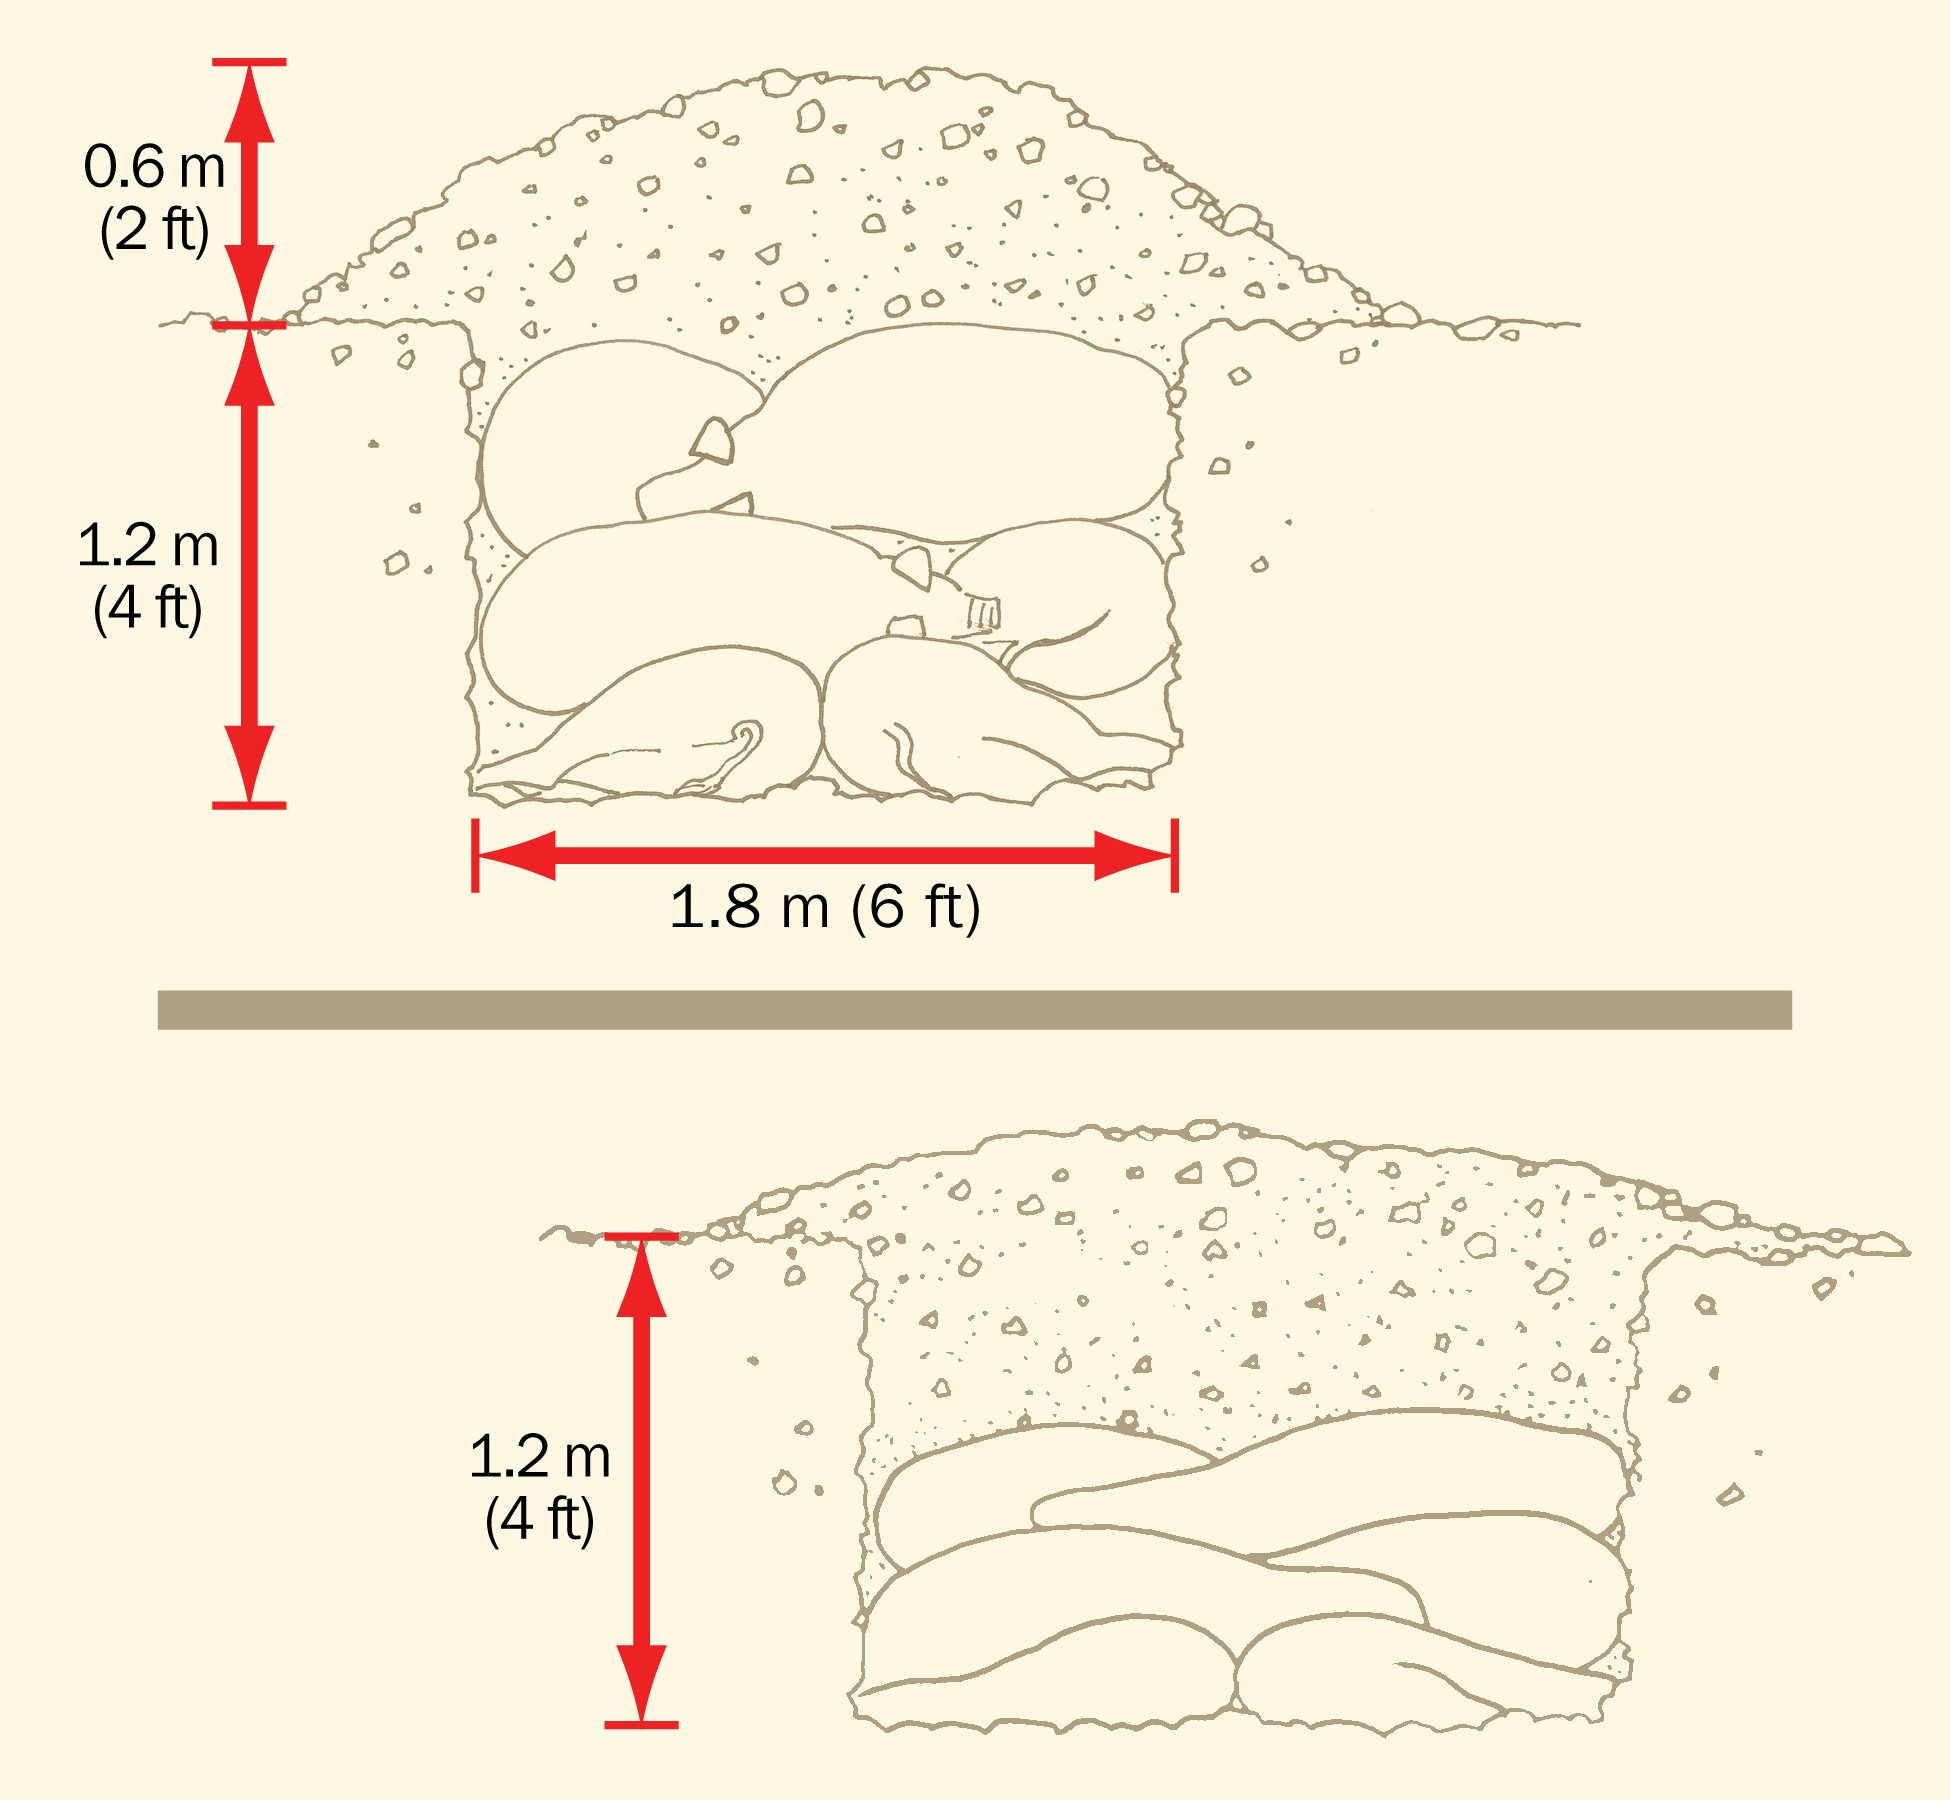
Place as much soil as possible in the spaces between deadstock to encourage quicker decomposition. Reduce the chance of a cave-in by pushing in soil rather than dumping it in. The regulation specifies a burial pit must be closed by filling it with enough soil that the top of the fill soil forms a mound higher than the level of the ground at the perimeter of the pit by the greater of half the depth of the pit measured with reference to its lowest point or 0.6 m (2 ft).
This ensures enough soil on top of the deadstock to reduce the chance of scavenging, but also allows for settling as the deadstock decomposes and soil falls into the voids between them (Figure 6). The minimum amount of soil required above ground after closing the pit varies depending on pit depth (Table 6).
Accessible description of Figure 6
| Depth of pit | Minimum soil depth required above ground |
|---|---|
| 1.8 m (6 ft) | 0.9 m (3 ft) |
| 1.5 m (5 ft) | 0.75 m (2.5 ft) |
| 1.2 m (4 ft) | 0.6 m (2 ft) |
| 0.9 m (3 ft) | 0.6 m (2 ft) |
| 0.6 m (2 ft) | 0.6 m (2 ft) |
Lightly compact the soil using a front-end loader or backhoe bucket. Do not drive over the pit. Mark the area with a flag for a period of time so you can find the location again and monitor it for scavenger problems, uneven settling or leaching. Refer to O. Reg. 106/09 for the recordkeeping required for the deadstock, including the location. Include GPS coordinates of the site if possible.
Additional information on the requirements of specific disposal methods is available from deadstock management of farm animals in Ontario.
Disclaimer
The information in this document is provided for informational purposes only and should not be relied upon to determine legal obligations. To determine your legal obligations, consult the relevant law. If legal advice is required, consult a lawyer. In the event of a conflict between the information in this factsheet and any applicable law, the law prevails.
This fact sheet was updated by Dan Ward, P. Eng., poultry and other livestock housing and equipment, Ministry of Agriculture, Food and Rural Affairs (OMAFRA). It was originally written by Hugh Fraser, P. Eng., agricultural engineer, OMAFRA (retired).
Accessible image descriptions
Figure 2
Figure 2 shows a backhoe digger parked next to 3 different sized trenches that were dug to receive deadstock. For best results with burial, it is recommended to maximise the soil to carcass contact area.
On the left side of illustration, there is a trench measuring 9 m long × 0.6 m wide by 1.2 m deep this would be used for 2500 kg of small size deadstock like poultry or mink.
Middle of the illustration shows a trench measuring 4.5 m long × 1.2 m wide × 1.2 m deep, this would be used for 2500 kg of mid-size deadstock like sheep, goats or swine.
On the right side of illustration is a trench measuring 3 m long × 1.6 m wide × 1.2 m deep this would be used for 2500 kg of large deadstock like cattle or horses.
Figure 4
The illustration shows newly dug burial trench located within 6-15 m horizontal distance of a subsurface tile drain. In this case the trench needs to be dug deeper as uppermost deadstock placed in the trench must be below the level of tile drain.
Figure 6
The upper half of the illustration shows a cross section of a freshly filled 1.8 m wide × 1.2 m deep trench. Soil material has been mounded to a depth of at least 0.6 m above grade over the center of the trench. This will prevent scavenging and allow for settling as the deadstock decomposes.
Lower half of the illustration shows cross section of the same 1.8 m wide × 1.2 m deep trench after some time has elapsed. The depth of mounded soil over the center of the trench has dropped as due settling during deadstock decomposition.